Sometimes, we need to do things in different ways.
I’ve a new ESXI 5 Server, and i want to have a NAS virtual machine on it.
The problem is that ESXI doen’t not support direct access to SATA drives, and use virtual image disks for a NAS is not a good thing (very bad performance).
For bypass this problem, we use Raw Disk Mapping (RDM).
Please use at your own risk, and if you do escalate a Support Request (SR) to VMware Support, do not be surprised if they state this is unsupported.
VMware’s definition of an RDM
‘Introduced with VMware ESX Server 2.5, raw device mapping allows a special file in a VMFS volume to act as a proxy for a raw device. The mapping file contains metadata used to manage and redirect disk accesses to the physical device. The mapping file gives you some of the advantages of a virtual disk in the VMFS file system, while keeping some advantages of direct access to physical device characteristics. In effect, it merges VMFS manageability with raw device access.’
Traditionally and VMware supported, a Raw Disk Mapping (RDM) which may be used to present a LUN directly to a virtual machine from a SAN. The SAN could be Fibre Channel or iSCSI.
Why would we want to create a Raw Disk Mapping (RDM) of a local storage device?
- An RDM can offer improved performance, which can be used for more disk I/O intensive applications such as database servers.
- You may already have a data partition on the disk you want to present directly to the VM.
- There is a limitation in VMware Hypervsior ESXi 4.x of a 2TB VMFS datastore limit, this can be overcome by using RDMs.
- VMware Hypervisor ESXi 4.x and VMware Hypervisor ESXi 5.0 have a 2TB virtual disk (VMDK) limit.
- You may want to have access directly to local storage to create a JBOD, because you do not have a supported storage controller,
- SCSI controller may not be supported by VMware Hypervisor ESXi.
- Creating a VMFS datastore on a single SATA drive can be slow.
- Creating a 500GB virtual disk on a single SATA drive can be slow.
A few valid reasons why you may want to create an RDM of a local storage device.
This solution creates a RDM virtual disk proxy mapping file on an existing mounted VMFS datastore. This virtual disk proxy mapping “file” is then added to a Virtual Machine. I would recommend that RDM disks are used for data storage only e.g. SQL databases, large file servers.
The following procedure can be used to create the RDM on a local storage device. In the following example, a Seagate ST3500320AS 7200k rpm 500GB SATA disk is going to be used to create an RDM.
1. Connect to the VMware Hypervisor ESXi server via SSH
2. Obtain the physical disk path of the storage device
There are a number of methods that can be used to find the physical disk path, the vSphere Client can be used, check Storage Adaptors, but the easiest way to find the physical disk path of your storage device is to use the commands
esxcfg-mpath -l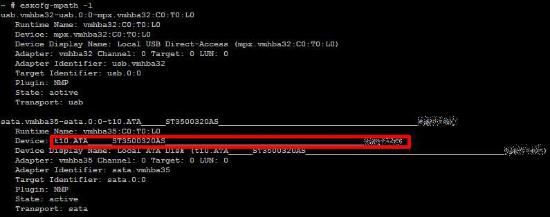
or
ls -al /vmfs/devices/disks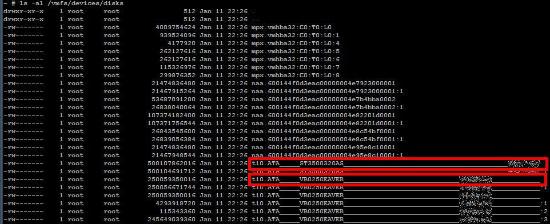
using the above commands, we can cut and paste the physical disk path, which when using SATA devices can be very long and difficult to type.
In the above sessions the physical disk path is
t10.ATA_____ST3500320AS___(i’ve obsecured the screenshots above, because it includes a serial number for the Seagate ST3500320AS 7200k rpm SATA disk.). I’ve also replaced the serial number with Xs above.
If using a SCSI storage controller the physical disk path could be
example vmhba4:1:0:0
3. Using the vmkfstools command to create the RDM
Using the command vmkfstools we can create a RDM linked to a local storage device.
the command syntax is
vmkfstools -r <source> (space) <destination>vmkfstools -r /vmfs/devices/disks/<phyat the console prompt type
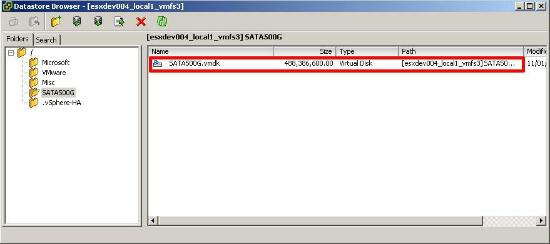
vmkfstools -r /vmfs/devices/disks/t10.ATesxdev004_local1_vmfs3 is the friendly VMFS datastore name
SATA500G is a folder created on the VMFS datastore to store the proxy mapping (vmdk) file.
SATA500G.vmdk is the name of the proxy mapping file (false virtual disk – vmdk.)
I’ve replaced the serial number with Xs above.
After entering the above command, vmkfstools does not respond with any output this is normal. If you check the datastore, you will see that a virtual machine disk named SATA500G.vmdk has been created.
If the console return this error:
DISKLIB-LIB : Unable to get file system ID for filenameYou can try to navigate to the path where yhe new vmdk should be create, and give the same command without the path in the second parameter:
cd /vmfs/volumes/<vmfs datastore name>/<folder name>/
vmkfstools -r /vmfs/devices/disks/<phy4. Adding the RDM to a Virtual Machine
Using the VMware vSphere Client, Login and Connect to the ESXi server, using IP address or hostname of the ESXi server, using root username and password credentials. If you have a VMware vSphere vCenter server, you could also specify IP address or hostname of the vCenter server.
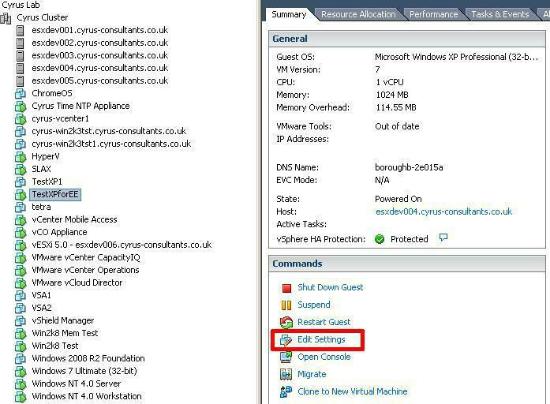
5. Select an existing virtual machine
Select an existing virtual machine, you want to add the RDM to, and select Edit Settings. The new hard disk can be added whilst the virtual machine is powered on or off. Hotplug is supported on some Windows OS.
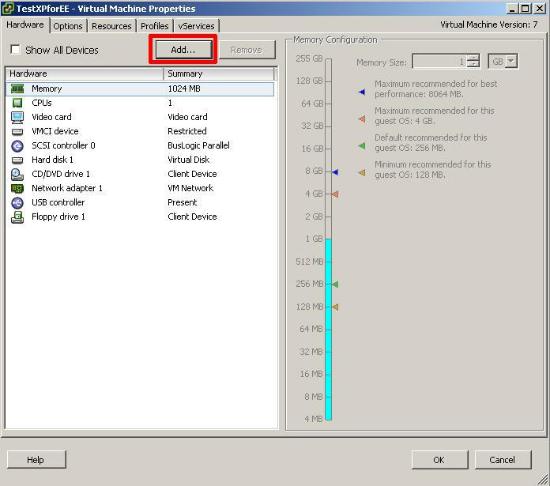
Click Add to add a new device
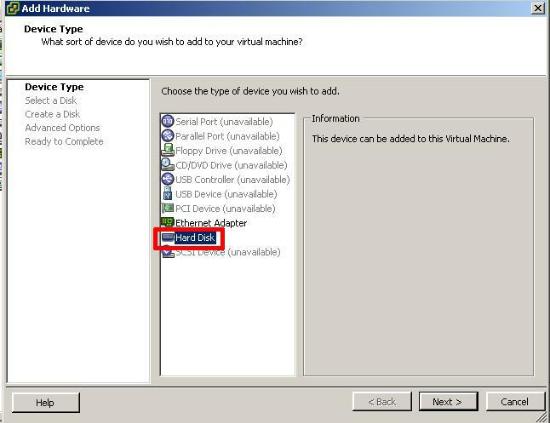
Click Add Hard Disk followed by Next
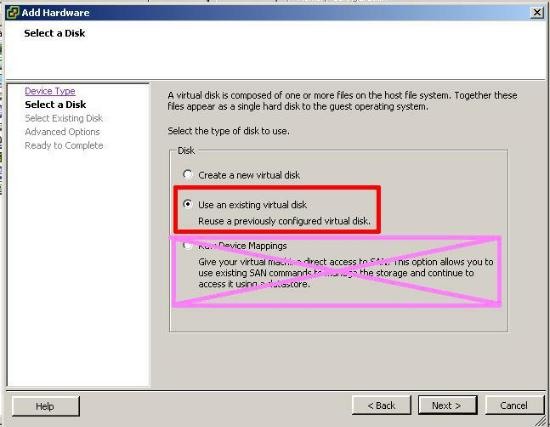
Select Use an existing Virtual Disk
(please do not select Raw Device Mapping)
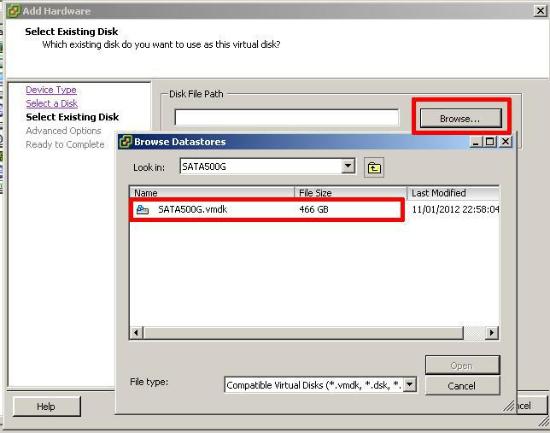
Browse the datastore and select the VMDK file and click OK, followed by Next
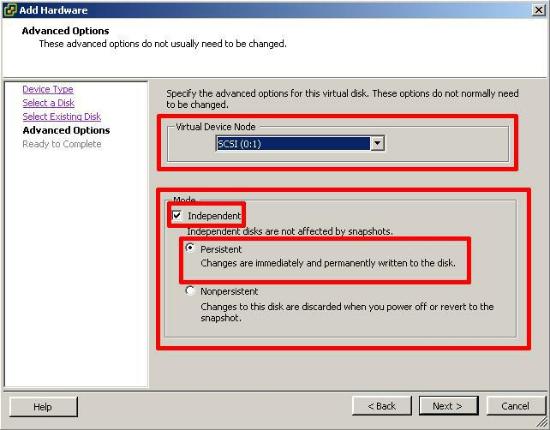
Select a SCSI Virtual Device Mode. Select Mode – Independent – Persistent. Followed by Next.
Review the selected options and Click Finish
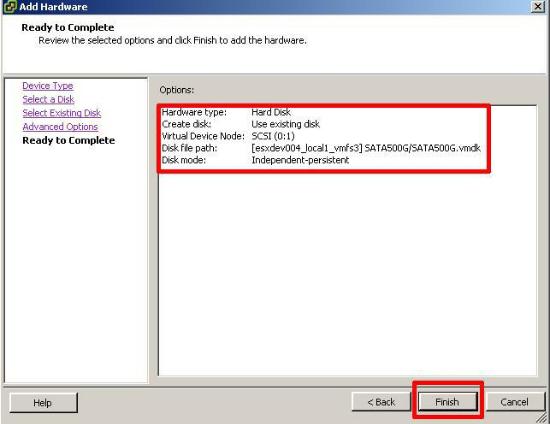
The virtual machine will report a Mapped Raw LUN has been added.
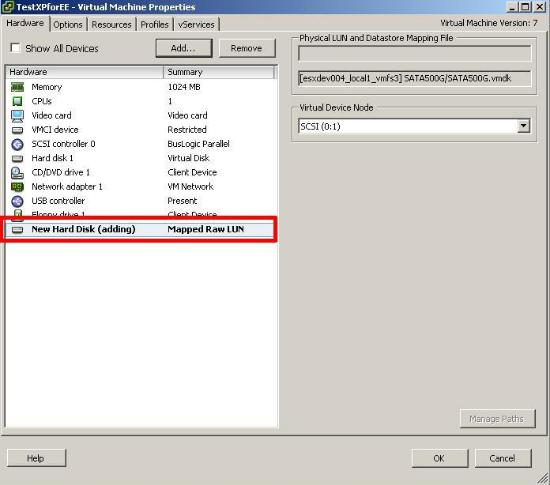
The “magic” has been completed and we have successfully added a Mapped Raw LUN (RDM), which is the local SATA 500GB hard disk. Check that the words Mapped Raw LUN are present.
Click OK and wait several seconds for the device to be added to the virtual machine.
6. Checking the hard disk in the Virtual Machine
If the disk has some old partition, you can remove them with:
# fdisk /dev/sdbOutput:
The number of cylinders for this disk is set to 9733.
There is nothing wrong with that, but this is larger than 1024,
and could in certain setups cause problems with:
1) software that runs at boot time (e.g., old versions of LILO)
2) booting and partitioning software from other OSs
   (e.g., DOS FDISK, OS/2 FDISK)
Command (m for help):
(where /dev/sdb is the added disk)
Now type p command to list partition:
Command (m for help): pOutput:
Disk /dev/sdb: 500.0 GB, 80060424192 bytes
255 heads, 63 sectors/track, 9733 cylinders
Units = cylinders of 16065 * 512 = 8225280 bytes
   Device Boot      Start         End      Blocks   Id  System
/dev/sdb1   *           1        2432    19535008+  83  Linux
/dev/sdb2            2433        2554      979965   82  Linux swap / Solaris
Now let us say you want to delete /dev/sdb1 (1st partition). Type the d command to delete a partition:
Command (m for help): dIt will prompt you for the partition number. Type 1:
Partition number (1-4): 1Verify that partition deleted:
Command (m for help): pNow save the changes and exit to shell prompt. Type the w command:
Command (m for help): wLet’s add a new partition:
Command (m for help): nand save again:
Command (m for help): wWe need to format this partition with a filesystem for mount on Ubuntu, so:
use mkfs.ext4 to format the partition with ext4:
mkfs.ext4 /dev/sdb1Note that mkfs.ext4 expects a partition as its argument, and it have to be the new partition that we have created above.
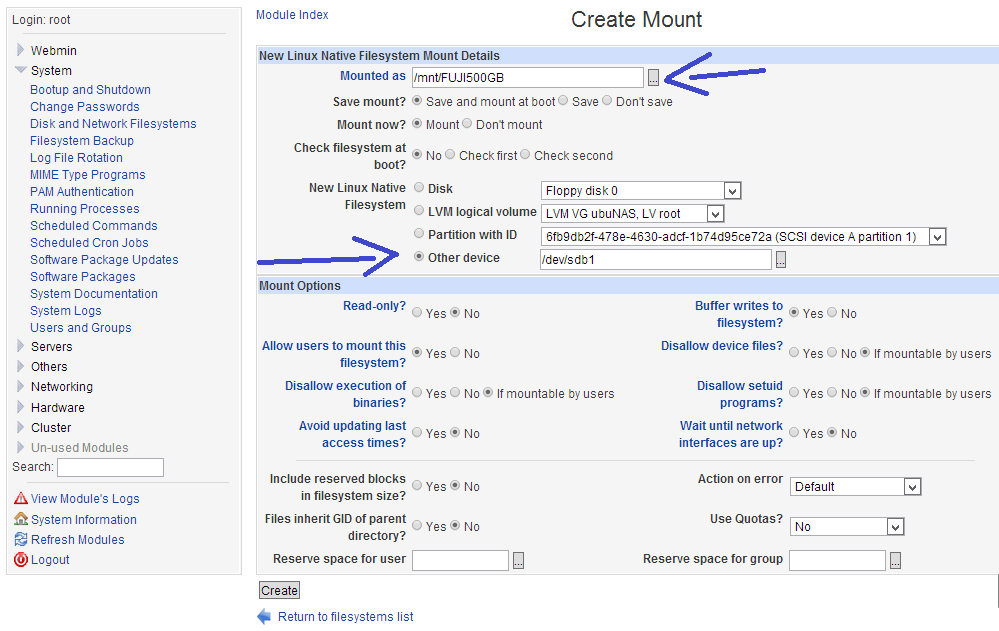
Ok, so now the last thing is add the new partition in webmin:
This is a little read/write test between this VM (with SATA mounted) VS a real ubuntu machine. The Source 4GB file is on a RAID in Gigabit Lan.
Write of file on VM:
60mb/s
Write of file on ubuntu machine:
50mb/s
Read of file from VM:
75mb/s
Read of file from ubuntu machine:
45mb/s
Performance is not so bad! 😀
We’re a group of volunteers and starting a new scheme
in our community. Your website provided us with valuable information to work on. You’ve done an impressive job and our entire community will
be thankful to you.