Menu Close

Smart Domotik – L’hardware che lo gestisce

domotica3Voglio fare un piccolo post riguardo all’hardware che gestisce Smart Domotik, e come l’ho implementato.

La scheda principale che comanda le luci, come spiegato nell’articolo Realizzazione passo passo parte 1 ha già al suo interno un’interfaccia base di gestione, ma ho preferito appoggiarmi ad un webserver più completo in modo da non gravare totalmente sulla scheda e poter espandere il sistema senza limitazioni.

Attivare un dominio senza www su Tophost.it

by Ilariapillai.it
redirect-tophost-senza-con-www[1]

Uno dei siti che ho creato è stato hostato su Tophost.it, ed avuto quindi necessità di effettuare il redirect dal dominio senza www a quello con www, in maniera da evitare che un utente, digitando il indirizzo del sito visualizzasse la classica frase:

Impossibile trovare nomesito.it.
Forse cercavi: www.­nomesito.­it

Su molti hosting tale redirect avviene automaticamente, con Tophost occorre effettuare alcune operazioni per far sì che il redirect funzioni:

immagina..puoi! Con PowerWasp!

Ok ok.. il titolo non è dei migliori.. ma non mi veniva altro 🙂

Le stampe con la PowerWasp continuano, e ogni volta riesco a stupirmi!

Ovviamente, non posso stampare solo cose da nerd, questo è sicuro.. e ogni tanto, bisogna far contente anche le donne!

La mia ragazza mi ha chiesto: “Ma si può stampare tipo una scarpa?”

“Tutto si può stampare con una stampante 3D!”

Il tuo preventivo è troppo caro!

Nel mondo del Web ormai ci si trova difronte a situazioni che tendono all’inverosimile.

Fare un preventivo, proporre un prezzo ONESTO che non sembri una ladrata alle persone a cui si offre è sempre un grosso problema, sopratutto al giorno d’oggi dove tutti sembrano dei grandi espertoni ed effettuano lavori (se cosi li vogliamo chiamare!) al limite del gratuito ( e aggiungerei al limite della decenza!).

Voglio quindi fare una piccola riflessione portando alla luce questa piccola storia che ho trovato in rete, che secondo me spiega benissimo a chi pensa ogni volta che il prezzo di un preventivo nel mondo della tecnologia sia troppo elevato:

How And Why You Should Backup Evernote

by cloudhq

 tumblr_inline_mh4ovtqkdp1qzlk80Evernote is currently one of the leading cloud services. Its popularity has grown, not only for individual use, but for corporate use as well. However, protection against data loss is one of the most critical security points for individuals and small businesses and has created the need to backup Evernote.

Why Backup Evernote?

Evernote stores all of your data on their servers and it is highly unlikely that any of your data will ever be lost, at least not due to any error by Evernote.

However, user error is the leading cause of data loss- and Evernote cannot help you in that case. But you can help yourself- you just need to backup Evernote.

In 1990, noted organizational theorist and sociologist Charles B. Perrow noted in his book “Normal AccidentsLiving with HighRisk Technologies” that operators and the personnel handling data are the blamed for disasters and data loss 60-80% of the time. Other studies have shown that of all the users that accidentally deleted or modified their data, 70% don’t even remember when. In most cases, by the time the data loss is discovered, the Evernote history and trash is completely gone. This would not happen if you backup Evernote data. Whether accidental or deliberate, human error can cause huge problems for individuals, small businesses and large enterprises- data loss can cause a loss of revenue, as well as the loss of important and critical information. The need to backup Evernote to another system is of utmost importance to prevent these costly occurrences.

Format drive using fdisk on Linux

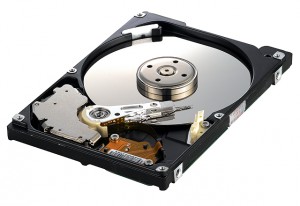
hard_disk[1]by hardcode.nl

Here’s a short sum-up on how to (re-)format your hard- or usb drive from the command line using fdisk.

Don’t do any of this unless you fully understand what you are trying to do.

This will wipe your drive clean, deleting all that’s on it.

To list available drives on you machine type:

fdisk -l

Choose the drive you want to make changes to and engage it using fdisk:

fdisk /dev/sdc

replace the “sdc” with the drive you want to edit.
Changes you make using fdisk are only made permanent if you then issue the “w” command. You can abort any time using ctrl – c