Deluge is a great BitTorrent client that you can install on Ubuntu to allow you to share your favourite files with the rest of the BitTorrent community.
In the newer versions of Ubuntu, Deluge comes in two parts; the server (also called the daemon) and the user interface. This means you can install the Deluge daemon as a headless service and then control it from a remote machine. You can either control the daemon using the Deluge client itself (for example the Windows version of Deluge) or alternatively you can use your browser to control it. If you’ve not installed VNC and are running a purely headless setup then running Deluge headless is pretty much your only option! So, here’s how you install it:
For Ubuntu version 11.04 or above, follow this guide: http://dev.deluge-torrent.org/wiki/UserGuide/Service/Upstart
So, first off we need to create a new user called “deluge” and perform a couple more steps:
sudo adduser --disabled-password --system --home /var/lib/deluge --gecos "SamRo Deluge server" --group delugesudo touch /var/log/deluged.logsudo touch /var/log/deluge-web.logsudo chown deluge:deluge /var/log/deluge*Install the Deluge Daemon
Add the Deluge PPA and update your repository list
sudo add-apt-repository ppa:deluge-team/ppa
sudo apt-get update
If you cannot run the add-apt-repository command, install eithersoftware-properties-common on Ubuntu 12.10 and above orpython-software-properties on Ubuntu 12.04 and below.
Install the Deluge daemon and the Deluge WebUI
sudo apt-get install deluged deluge-webRun the Deluge Daemon on startup
Now we’ve got the components installed we need to make everything run on start-up. So, let’s create the first script we need by typing the following command in a Putty Session:
sudo vim /etc/default/deluge-daemonThis will create and open a file called deluge-daemon.
Next, assuming you’re using Putty, highlight the following 5 commands, right-click on them and select Copy
# Configuration for /etc/init.d/deluge-daemon
# The init.d script will only run if this variable non-empty.
DELUGED_USER="deluge"
# Should we run at startup?
RUN_AT_STARTUP="YES"
Toggle back to the Putty Session and press the [Insert] key once and add a couple of blank lines by pressing the [Enter] key. Next right click and the 5 lines we’ve just copied above will be pasted into the file.
Now press the [Esc] key once and type :wq to save and quit out of the script. If you make a mistake editing the file then issue :q! instead of :wq to abort your changes.
Creating the “Init Script”
Now we need an “init script”. This script is rather long but we can do some more copying and pasting to implement this script. So, type the following command in your Putty Session to create and open the script:
sudo vim /etc/init.d/deluge-daemonNext, highlight and copy this script, copied from here.
Toggle back to your Putty Session and press the [Insert] key once and then right click and the whole script you’ve just highlighted will be pasted into the screen.
As before, press the [Esc] key once and type :wq to save and quit out of the script. If you make a mistake editing the file then issue :q! instead of :wq to abort your changes.
We now need to make this script executable. So:
sudo chmod a+x /etc/init.d/deluge-daemonNow we need to make sure this script runs on start-up. To do this type the following command:
sudo update-rc.d deluge-daemon defaultsCross your fingers and restart the server by typing the following command:
sudo reboot -h nowAccessing Deluge via the web interface
You should now be able to access the Web front-end for Deluge by typing http://MyMediaserver:8112 into the address bar of your browser where MyMediaserver is the name you gave to your server when you installed Ubuntu. Alternatively the IP address of the server works just as well.
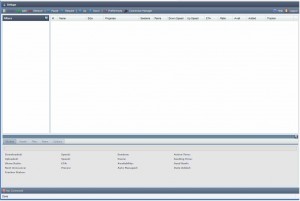
You should now be presented with the Deluge login-screen. Enter deluge for the password and you should then see a screen similar to this (Note: The version on Maverick looks slightly different to this):

Opening the correct ports on your router
In order to start downloading Torrents you need to open up some ports on your router. If you click on the Preferences icon (the screwdriver/spanner) on the Deluge web interface and select Network, the Incoming Ports (the From: andTo: ports inclusively) are the ports you need to open on your router. You can obviously change these ports if so wish, but make sure they match your router settings. Make sure you also uncheck the Use Random Ports option if you’re going to be opening a specific port range on your router.
Starting and stopping the web daemon:
If at any time you want to stop the web daemon then you can do so by issuing the following command:
sudo /etc/init.d/deluge-daemon stopTo start it again use start instead of stop in the above command. To restart it use restart.
NOTE: The above instructions are a summary of the excellent guide which can be found here.